|
Extra Notes for WinDaq Add-ons |
|
If channel index number is required as user input for a WinDaq add-on, please enter the 0-based index to Windaq's scanlist.
Exception: For DI-71x and DI-155, the digital channel always takes up the first index if it is enabled, even though it is NOT the first member in the scanlist!
DI-710, 718, 715 or DI-155 All others Any of the following conditions is true:
- Digital Channel is enabled, where digital channel is noted by "I" in the channel selection grid
- WinDaq->Option->Remote Events is checked
- WinDaq->Option->Remote Storage is checked
All of the following conditions are true:
- Digital Channel is NOT enabled
- WinDaq->Option->Remote Events is not checked
- WinDaq->Option->Remote Events is not checked
Any configuration 0 is always the digital channel 0 is the first channel in the scanlist 0 is always the first channel in the scanlist Example: WinDaq has channel 3,4,6,7 and I (digital) and R (Rate) enabled.
Since digital channel I always takes the first spot in the data stream even though it is the last member in the scanlist, one has to enter 0 for the digital channel, 1 for channel 3, 2 for channel 4, 3 for channel 6 and 4 for channel 7 and 5 for channel R .
Example: WinDaq has channel 3,4,6,7, R (Rate) and C (Counter) enabled.
Since no digital channel is enabled, we have 0 for channel 3, 1 for channel 4, 2 for channel 6, 3 for channel 7, 4 for for channel R and 5 for channel C.
Example: WinDaq has channel 3,4,6,7 and I (digital) enabled.
Since the digital channel does not affect the index, one enters 0 for channel 3, 0 for channel 4, 2 for channel 6, 3 for channel 7 and 4 for the digital channel.
-
Many add-ons retain their configuration on exit
-
To use this feature, you should start the add-on from the SAME WinDaq logical channel. For example, highlight the second channel on WinDaq, start the add-on, set up the add-on then exit. Now the configuration is saved in a configuration file associated with second channel. You can have multiple configurations for the same device, each configuration associated with a different WinDaq logical channel. To recall the configuration stored associated with logical channel 2, highlight the channel on WinDaq, start the add-on.
-
The logical channel mentioned above is not the physical channel, it is the logical order of a physical channel listed in the channel selection box. For example, we have two WinDaq setups, one with physical channel 1,2,3,4,6,8, and the another with physical channel 6,7,9,10,14,15. If the add-on configuration is associated with the second logical channel, then highlighting physical channel 2 from the first setup then start the addon will be the same as highlighting physical channel 7 then start the addon.
Exceptions
-
Because the default WinDaq configuration for DI-2008, 2108 series and 1100 series doesn't specify the serial number of the devices, there is no way to retain the configuration for a specific device, i.e. if you have an add-on configured for a DI-2008, and later you start a DI-1120 on the same PC, the add-on will pick up the configuration "retained" for the DI-2008
-
If you need to work around this matter, you can follow DATAQ's instruction below (
-
Exam the start up icon property to identify the names of the DLL and application folder, for example, a DI-2008 uses DI-316ANT.EXE and DI-350NT.DLL
Other devices' default matching DLL names
DI-1100 DI300NT.DLLDI-1110 DI310NT.DLLDI-2108 DI320NT.DLLDI-1120 DI330NT.DLLDI-2108P DI340NT.DLLDI-2008 DI350NT.DLLDI-4108 DI360NT.DLL -
Create a separate directory such as 20081 for the second device with its own copy of setup file CODASPAR.BIN and <SYMLINK> to DI316ANT.EXE and WDQDK1632.EXE
-
Copy files in Windows\SysWOW64: DI350NT.DLL to DI351NT.DLL, DISCN350.EXE to DISCN351.EXE
-
Create a separate shortcut to start the second device, passing the 8-character serial number yyyyyyyy on a new command line Target: "C:\Program Files (x86)\DATAQ Instruments\20081\DI316ANT.EXE" -DDI351NT.DLL -Nyyyyyyyy. Paste the part of that command line inside and including the quotes as its "Start in": folder.
-
Insert the serial number xxxxxxxx for the first device at the end of its Target: command line immediately following the -N.
General Error Message
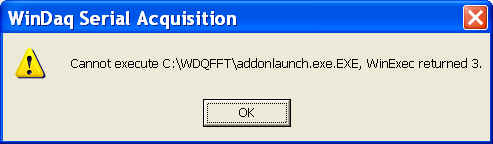
If you manually remove WinDaq add-on file folder, which is C:\WDQFFT by default, without removing the entries in TPDATAQ.INI. You will run into some of the following errors
"Cannot execute C:\WDQFFT\addonlaunch.exe.EXE, WinExec returned 3." when you start WinDaq.
This is caused by the missing batch launcher to start multiple add-ons after WinDaq starts
You may continue WinDaq by clicking on the OK button
To fix the error, you may either reinstall WinDaq add-on or edit TPDATAQ.INI and remove the TOOLS section totally.
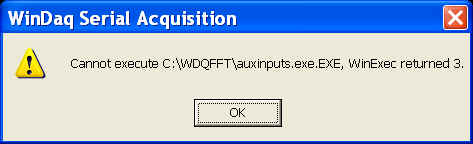
"Cannot execute C:\WDQFFT\??????.EXE, WinExec returned 3." when you start an add-on, where ?????? is the executable of the selected add-on
This is caused by the missing add-on executable
You may continue WinDaq by clicking on the OK button
To fix the error, you may either reinstall WinDaq add-on or edit TPDATAQ.INI and remove the TOOLS section totally.
Last update: 02/06/24
© www.UltimaSerial.com