Operating System:
Windows
Supported Devices:
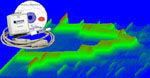
DATAQ's DI-710, DI-718B, DI-715B, DI-718Bx, both USB and Ethernet-based modules
Dataforth's isoLynx SLX 718, both USB and Ethernet-based modules
Firmware Requirement:
Firmware 2.00 or above
Daily record mode requires firmware version 2.11 or higher
Application :
Say you need to collect some data in the lab from 2AM to 4AM on a Sunday morning using DATAQ's di-710 data loggers. Until now you have the following options:
1) Start recording before you leave the office. You may end up with a huge file and a lot of useless data, or even worse, you may run out of space on your SD card before the designated time if the sample rate is high or the waiting time is long. FYI: a 1G SD card records less than 12 hours at DI-710's maximum speed
2) If you have DI-710ES, you can set up the alarm clock so that you can get out of bed before 2AM Sunday morning, run Hardware Manager to start the recording, set the alarm to 4AM, go back to sleep (hopefully), wake up again on the second alarm, and stop the recording.
3) If you have DI-710US instead, sorry, you will have to drive to the lab and push the record button.
4) Or, use the remote storage feature of DI-710, and find yourself a timing device so that it can close the remote storage switch at 2AM Sunday morning, and open the switch at 4PM, uh, it will be really a challenge to wire your mechanical clock for the job
Solution:
Now, with Record Scheduler for DI-710 series, you can schedule a recording session!
Once scheduled, it can automatically start/stop recording according to the schedule without connecting your DI-710 to a PC
Installation:

Operation:
1) Run Dataq's Hardware Manager to set up the stand-alone operation: Sample rate, Channels, etc
2) Select communication mode, USB or Ethernet. If it is ethernet, enter the IP. If it is USB, the scheduler will search and enter the virtual COM port for you automatically.
3) Push the button "Click here to Connect!" to connect to the device. Once connected successfully, the button's caption will be changed to "Connected" and the button "Set up timer" will be enabled
4) Specify the Start/End date/time. Check Daily option if you need it and your firmware supports it
5) Push the button labeled as "Set up timer". You should see "The recording operation is scheduled" when the operation is done
6) Disconnect 710 from the PC and deploy it!
* To remove the schedule, push "disable scheduler" button when setting up the start date in 4)
A Must Have for 71x Stand Alone data logger:
Last update: 02/24/22
Copyright: 2000-2011 www.UltimaSerial.com