The following is a step-by-step lesson on how to use ActiveX in Borland C++ Builder
In this lesson, we will use Ultimaserial ActiveX to develop a data acquisition application with DATAQ's Starter kit.
Specification of the sample program:
Acquire voltage signal between -10 to 10V via Channel 1 of DI-194 at a rate of 240 Samples/second
The data is streamed back to the PC via COM 1
The input signal is displayed on a scrolling waveform window
The following steps show you how to program the DI-194 under Borland C++ Builder.
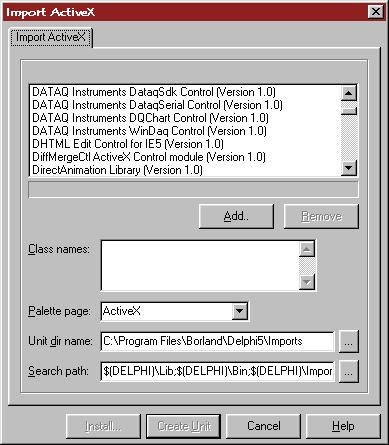
1) Start Borland C++ Builder, and follow Component -> Import ActiveX control ..., and you will see:
2) In the Import ActiveX dialogue box, select XChart from Ultimaserial
3) Click the Install button, then OKs to install XChart control to ActiveX tab to be used in Step 7)
4) Repeat 1) to 3) to install UltimaSerial control to ActiveX tab to be used in Step 7).
5) Enable Component Palette if it is not in the toolbar of Borland C++ Builder
6) If you like, you can restart Borland C++ Builder to have clean form. (You don't need to save anything at this point)
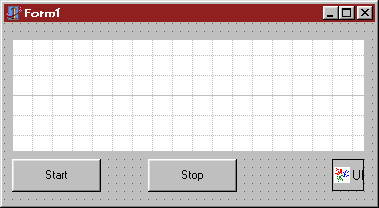
7) On the new form, add XChart, and UltimaSerial from the ActiveX tab. Let's call XChart's object name XChart1, and UltimaSerial's object name UltimaSerial1.
8) Add two buttons from the Standard tab and name them Start and Stop. Make sure Start button is object Button1 and Stop button is object Button2 so that we can use our sample codes directly.
9) On the form, double click on Start and Stop buttons to create the codes for them
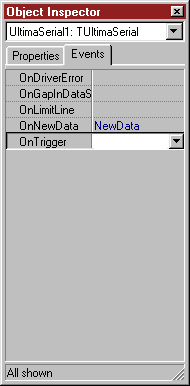
10) In the Object Inspector, select UltimaSerial1, and add the name "NewData" for the event NewData
11) In the code editor, change the default codes
From:
//---------------------------------------------------------------------------
#include <vcl.h>
#pragma hdrstop
#include "Unit1.h"
//---------------------------------------------------------------------------
#pragma package(smart_init)
#pragma link "XCHARTLib_OCX"
#pragma link "ULTIMASERIALLib_OCX"
#pragma resource "*.dfm"
TForm1 *Form1;
//---------------------------------------------------------------------------
__fastcall TForm1::TForm1(TComponent* Owner)
: TForm(Owner)
{
}
//---------------------------------------------------------------------------
void __fastcall TForm1::Button1Click(TObject *Sender)
{}
//---------------------------------------------------------------------------
void __fastcall TForm1::Button2Click(TObject *Sender)
{}
//---------------------------------------------------------------------------
void __fastcall TForm1::NewData(TObject *Sender, short ErrorCode)
{}
//---------------------------------------------------------------------------
To: (Watch for the blue text)
//---------------------------------------------------------------------------
#include <vcl.h>
#pragma hdrstop
#include "Unit1.h"
//---------------------------------------------------------------------------
#pragma package(smart_init)
#pragma link "XCHARTLib_OCX"
#pragma link "ULTIMASERIALLib_OCX"
#pragma resource "*.dfm"
TForm1 *Form1;
//---------------------------------------------------------------------------
__fastcall TForm1::TForm1(TComponent* Owner)
: TForm(Owner)
{
}
//---------------------------------------------------------------------------
void __fastcall TForm1::Button1Click(TObject *Sender)
{
UltimaSerial1->Device=194;
UltimaSerial1->CommPort =1;
UltimaSerial1->ChannelCount=1;
UltimaSerial1->EventLevel=2;
UltimaSerial1->SampleRate=240;
UltimaSerial1->Start();
}
//---------------------------------------------------------------------------
void __fastcall TForm1::Button2Click(TObject *Sender)
{
UltimaSerial1->Stop();
}
//---------------------------------------------------------------------------
void __fastcall TForm1::NewData(TObject *Sender, short ErrorCode)
{
XChart1->Chart (UltimaSerial1->GetData());
}
//---------------------------------------------------------------------------
12) Now you can run the program by following Run->Run, or simply hitting F9 key!
Last update: 03/14/22
Copyright: 2000-2005 www.UltimaSerial.com


